before bug cames
u have to dotest
snap shot testing, e2etesting, unit testing
https://github.com/Code-Pop/Unit-Testing-Vue-3/tree/lesson-6-starting
Jest Testing
popular javascript library
vue test utils
unit testing
improved code quality
boosted confidence
better documentaqtion
function generate random numbers
component contract
i will accept two props and use them to generate and display of a random number
inpouts are 1,10
outpts are 6
inputs are commonly
component data
props
user interaction
life cycle methods
vuex store
Route params
outputs
what is rendered to the dom
external function calls
events emittedy by component
updates to vuex store
changes in child components


A thoroughly tested application generally consists of a well implemented combination of several kinds of testing, including End to End (E2E) testing, sometimes Integration testing, Snapshot testing, and Unit Testing. This course specifically serves as a beginner’s guide to unit testing in Vue. As you’ll see throughout the course, unit tests serve as the foundation of a well tested app.
In this course, we’ll be using the popular Jest JavaScript testing library to run our tests, along with Vue Test Utils, the official unit testing utility library for Vue.
appheader.vue

v-show logged in is output
logged in is input
uniut testing => what u expecte dit is delivered or not
in above it is showing that button or not
in unit testign we focus on how its work
write a unit test with jset
vue create unit-testing-vue

after installing it install like below

at jest.cofnig.js
at pacakge.json
npm run test:unit
uni/tests
=npm run test:unit
wriet ein component s
appheader.vue
what is hte input
-
if input is wrong , button not show
if we run npm run:test
it will go to test folde r
run which has name ended with .specs.js
in appheaer.specs.js
write test give input thenshow
ist import then wrong conditon, then right conditon
import component
then describe ();
describe('AppHeader',()=>{})
describe('AppHeader',()=>{
test('tet',()=>{})})
test('tet',()=>{expect(true).toBe(true)})})
=
wrapper
==
using async we can force updatge the dom

What to test
Have you ever deployed a new feature in your app and crossed your fingers, hoping you don’t wake up to the news that you’ve accidentally introduced a brand new bug? You can greatly reduce these kinds of concerns, and strengthen your Vue apps, by testing your application.
A thoroughly tested application generally consists of a well implemented combination of several kinds of testing, including End to End (E2E) testing, sometimes Integration testing, Snapshot testing, and Unit Testing. This course specifically serves as a beginner’s guide to unit testing in Vue. As you’ll see throughout the course, unit tests serve as the foundation of a well tested app.
In this course, we’ll be using the popular Jest JavaScript testing library to run our tests, along with Vue Test Utils, the official unit testing utility library for Vue.
Goals of writing tests
In the following lesson, we’ll write our first test. But first, let’s gain a clear understanding of the benefits of testing your apps. What do we hope to gain from all of this added work of writing more code to test our code?
Boosted Confidence
Beyond sleeping better at night after a new feature deployment, testing helps bring everyone in your team onto the same page. If you’re new to a repository, seeing a suite of tests is like having an experienced developer sitting right next to you and watching you code, making sure you are staying within the proper lanes of what the code ought to do. With these tests in place, you can feel confident you aren’t breaking anything when adding new functionality or changing existing code.
Quality Code
When you write your components with testing in mind, you end up creating isolated, more reusable components. If you start writing tests for your components and you notice they aren’t easy to test, this is a clear sign that you can probably refactor your components, which can end up improving them.
Better Documentation
As alluded to in the first point, another result of testing is that it can end up producing good documentation for your development team. When someone is new to a code base, they can look to the tests for guidance, which can provide insight around the intentions for how the components should work, and provide clues to edge cases that may be tested for.
Identifying what to test
So we know that testing is valuable, but what exactly should we be testing in our applications? It’s easy to go overboard and test things you don’t have to, which unnecessarily slows down development time. So what do we test in a Vue.js app? The answer is actually quite simple: components. Since a Vue app is merely a puzzle of interlocking components, we need to be testing their individual behavior to make sure they’re working correctly.
The Component Contract
When first learning about Vue unit testing myself, I found it helpful when Ed Yerburgh (who literally wrote the book on Testing Vue.js Applications) spoke about thinking through the component contract. By that, we’re referring to the agreement between a component and the rest of the application.
For example, imagine a component that takes in a min and max prop and generates a random number between those prop values, which it renders to the DOM. The component contract says: I will accept two props and use them to produce a random number. Inherent within this contract is the concept of inputs and outputs. The component agrees to receive the min and max props as inputs and to deliver a random number as the output. As such, we can start to pick apart what we should be testing by thinking through the component contract, and identifying the inputs and outputs.
At a high level, common inputs and outputs are as follows:
Inputs
- Component Data
- Component Props
- User Interaction
- Ex: user clicks a button
- Lifecycle Methods
mounted(),created(), etc.
- Vuex Store
- Route Params
Outputs
- What is rendered to the DOM
- External function calls
- Events emitted by the component
- Route Changes
- Updates to the Vuex Store
- Connection with children
- i.e. changes in child components
By focusing on these specifically, you avoid focusing on the internal business logic. In other words, we shouldn’t be getting bogged down by worrying about how every single line of code works. It may seem counterintuitive, but the goal of unit testing is purely to ensure your components are producing the expected results. We aren’t concerned here about how it arrived at that result. We may even change the way we’re logically arriving at that result later on, so we don’t want our tests to be unnecessarily prescriptive about how that ought to be achieved. It’s up to your team to figure out the most efficient path to that result. That’s not the job of testing. As far as a unit test is concerned, if it works, it works.
Now that we know what we should be testing for, let’s look at a couple basic examples and identify what we might test in each.
Example: AppHeader Component
In this example, we have a component that will display a logout button if the loggedIn property is true.
📄 AppHeader.vue
<template>
<div>
  <button v-show="loggedIn">Logout</button>
</div>
</template>

<script>
export default {
  data() {
    return {
      loggedIn: false
    }
  }
}
</script>
To get clear on what part of this component we ought to test, our first step is to identify the component’s inputs and outputs.
Inputs
- Data (
loggedIn)- This data property determines if the button shows or not, so this is an input that we should be testing
Outputs
- Rendered Output (
button)- Based on the inputs (
loggedIn), is our button being displayed in the DOM when it should be?
- Based on the inputs (
With more complex components, there will be more aspects of it to test, but the same general approach applies. While getting a feel for what you ought to be testing is certainly helpful, so is knowing what you should not be testing. So let’s unpack that now.
What NOT to test
Understanding what doesn’t need to be tested is an important part of the testing story that many developers don’t think about, and in turn it costs them a lot of time that could be spent elsewhere.
Let’s look again at the example from earlier, where we have a component that takes in a min and max prop and outputs a random number within that range. We already know we should be testing the the output that is rendered to the DOM, and to do so we’ll need to be considering the min and max props in our test. But what about the actual method that is generating the random number? Do we need to test that?
The answer is no. Why? Because we don’t need to get lost in the implementation details.
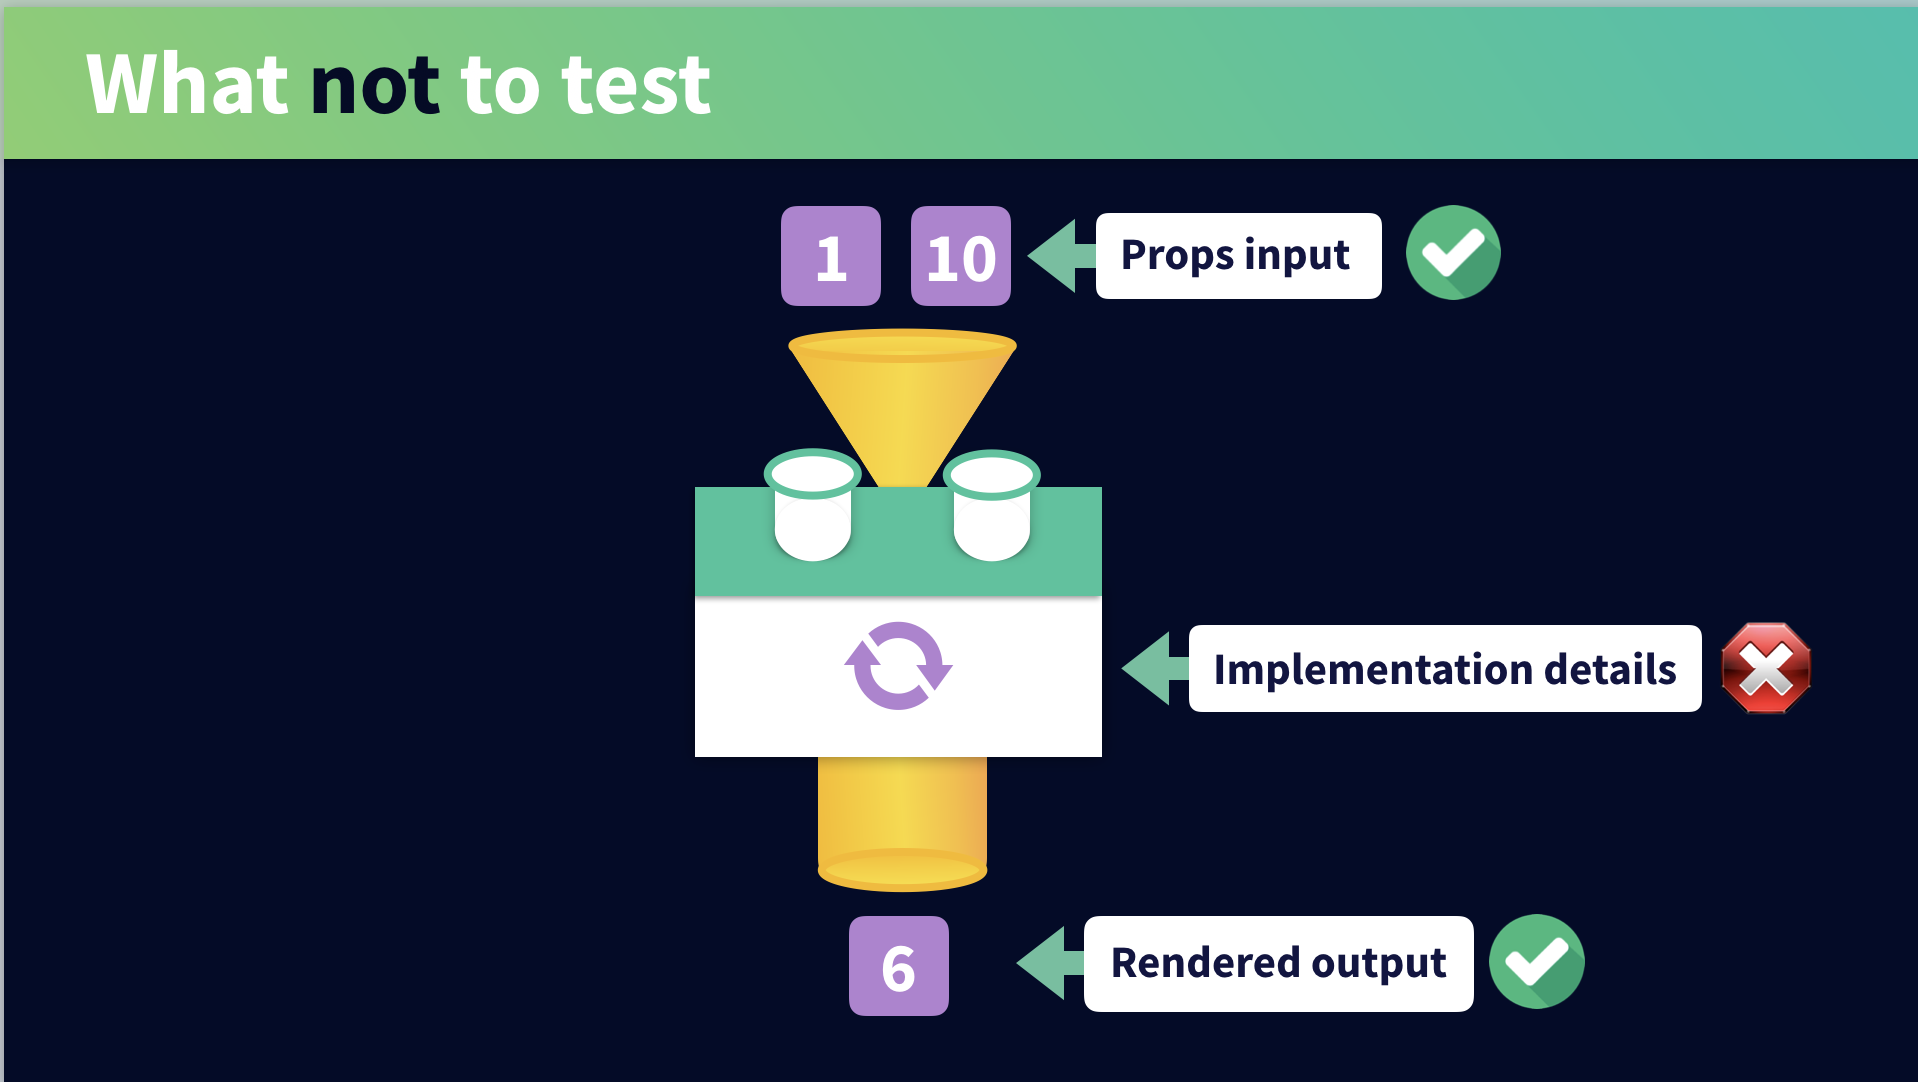
Don’t test implementation details
When unit-testing we don’t need to fuss over how certain things work, just that they do work. We don’t need to set up a test that calls the function that generates our random number, making sure it behaves in a certain way. We don’t care about the internals here. We just care that the component produced the output we are expecting. This way, we can always come back later and replace the implementation logic (with a third-party library for generating random numbers, for example).
Don’t test the framework Itself
Developers often try to test too much, including the inner workings of the framework itself. But the framework authors already have tests set up to do that. For example, if we set up some prop validation for our min and max props, specifying they need to be a Number , we can trust that Vue will throw an error if we try passing in a string. We don’t need to waste our time doing Evan You’s job and testing the Vue.js framework. This includes not doing needless tests on Vue Router and Vuex, too.
Don’t test third party libraries
If the third-party libraries you are using are of high quality, they will already have their own tests. We don’t need to test their internals. For example, we don’t need to test that Axios works how it should. The Axios team does that for us. These are the types of things that will bog us down if we worry about them unnecessarily. If you don’t feel you can trust the library you’re using to have been well tested, perhaps that’s a sign you might want to avoid using it to begin with.
Let’s ReVue
In this lesson, we took an important first step before writing effective unit tests: identifying what you should and shouldn’t be testing in components. With this approach, we can focus our time wisely on testing the pieces that need to be tested. In the next lesson, we’ll take this knowledge and write our first unit test.
Writing a Unit Test with Jest
In this lesson, we’re going to write our first unit test using Jest and Vue Test Utils. You can get started with the starting code available in this page’s lesson resources, or you can follow along and create the project from scratch using the Vue CLI.
Creating Our Project
We’ll create a new project using the Vue CLI. From the command line run the following command:
vue create unit-testing-vue
We’ll choose “Manually select features” and click enter so that we can specify which libraries we want to include in our new project. Since we will be learning how to test with Vue Router and Vuex, we’ll select both of those and of course we need to select Unit Testing. This will ****add the appropriate libraries to our project.
In the previous step, Linter / Formatter was selected by default, the next step allows us to customize that feature. For those, I selected ESLint + Prettier, and Lint on save. This configuration is totally up to you for this project.
Because we selected Unit Testing as a feature to include in our project, the next step asks what library we want to use for Unit Testing. We are going to use Jest.
We are going to put all of our configuration in their own dedicated files so you can leave the default here and press enter.
If you want to save this as a preset you can, if not type n and press enter. Our project will then be built for us.
Touring the Project Structure
With the project open, let’s start out by looking into the package.json, where we’ll see that Jest and vue-test-utils were installed for us.
📃package.json
"devDependencies": {
  "@vue/cli-plugin-unit-jest": "~4.5.0",
  "@vue/test-utils": "^2.0.0-0",
}
What do these libraries do again? As a reminder:
Jest is a JavaScript testing framework that focuses on simplifying your unit tests. Jest will run the unit tests for us and report back to us if the test passed or failed. While Jest is a pretty large framework (there are entire books written on the subject), you will only need to understand a few pieces to write some basic tests.
Vue Test Utils is the official unit testing utility library for Vue.js. It gives us the ability to render our components in our tests and then perform various operations on those rendered components. This is crucial for determining the actual results from a component’s behavior.
Great. We have the proper testing tools installed. But how do we get them to work? Notice this script command within our package.json:
📃package.json
"scripts": {
  ...
  "test:unit": "vue-cli-service test:unit"
},
This command essentially looks into the directory called tests / unit and runs the tests we’ve set up in our ComponentName.spec.js files.
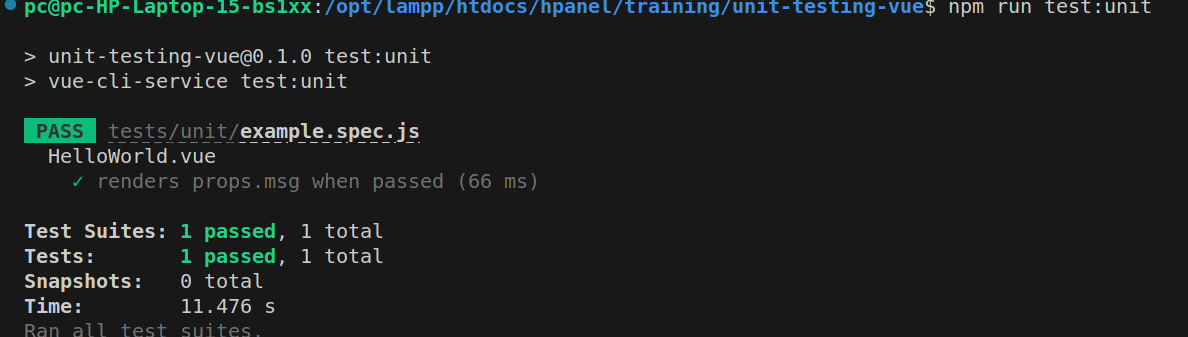
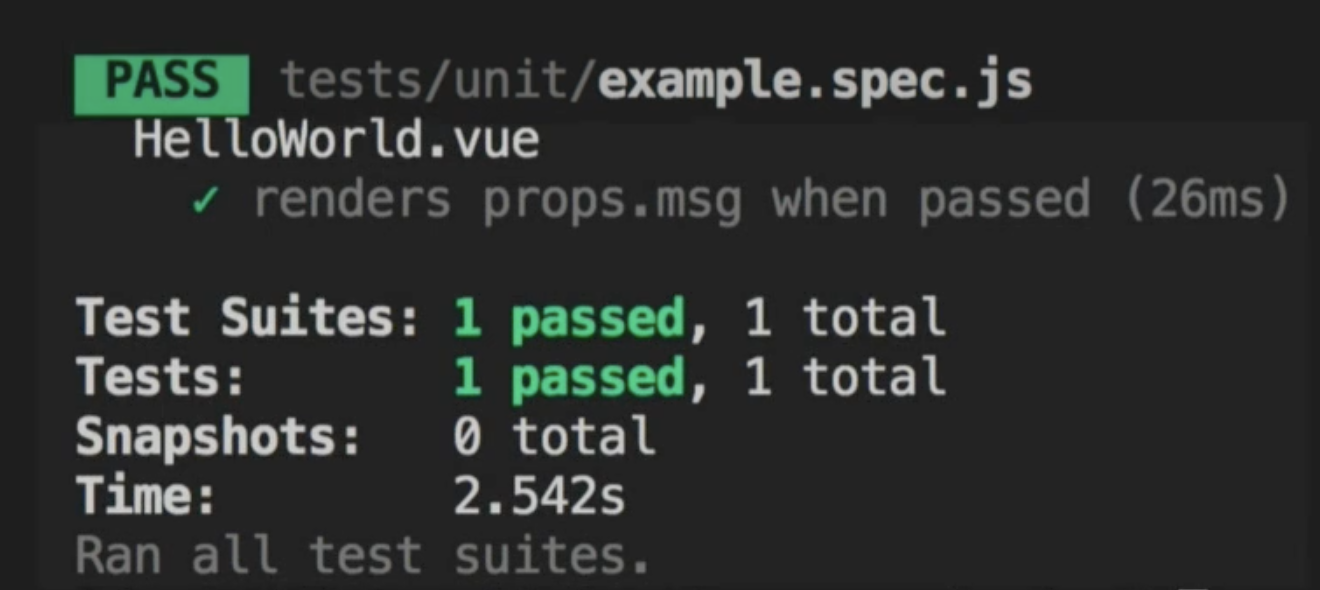
If we look inside our tests / unit directory, we’ll find an Example.spec.js file that was created for us. This is a dummy test file that is testing the HelloWorld.vue component in our src/components directory. For now, we’ll ignore what’s written inside that Example.spec.js file and go straight to our terminal and enter npm run test:unit
When we do that, we’ll see that the test within Example.spec.js is being run and it passes.
This is what we’re going to learn how to do by the end of this lesson. We’ll create a new component, set up some tests for it, and run those tests using the test:unit script command.
A new component and testing file
Before writing any tests, we need a component to test. So we’ll delete out the HelloWorld.vue component in src/components and then create a new file called AppHeader.vue, which looks like this:
📃AppHeader.vue
<template>
  <div>
    <button v-show="loggedIn">Logout</button>
  </div>
</template>

<script>
export default {
  data() {
    return {
      loggedIn: false
    }
  }
}
</script>
This component should look pretty familiar because we used it as an example in the previous lesson. It is a simple App Header that displays a Logout button when a user is loggedIn.
Now that we have a component to test, we can head into our test / unit directory, delete out the example testing file and create a new one called AppHeader.spec.js. As you can see in the naming convention here, we are using the name of the component we’re testing AppHeader + spec.js. Spec stands for specification because in this file we are essentially specifying how the AppHeader component ought to behave, and testing that behavior.
Note that these file names must include “spec.js” — without it, they won’t be run when we use the npm run test:unit script.
Identifying what to test
Before we can write tests for our AppHeader.vue component, we need to identify its inputs ****and outputs. Fortunately, we already covered that in the previous lesson.
Inputs
- Data:
loggedIn- This data property determines if the button shows or not
Outputs
- Rendered Output:
<button>- Based on theloggedIninput, is our button displayed in the DOM or not
We know that when loggedIn equals false (default), the Logout button is not displayed in the DOM. When loggedIn equals true, then the Logout button is displayed.
So our tests for this component are:
- If user is not logged in, do not show logout button
- If user is logged in, show logout button
Scaffolding our first unit test
Now that we know what we’re testing, we can head into our AppHeader.spec.js file and start writing our tests. First, we’ll need to import the component that we’re testing.
📃AppHeader.spec.js
import AppHeader from '@/components/AppHeader'
Now we can create our first test block by using the Jest describe() function.
📃AppHeader.spec.js
describe('AppHeader', () => {

})
A describe block allows us to group related tests. When we run our tests we will see the name of the describe block printed in the console. As its arguments, describe() takes a string for the name of the component along with a function where the tests will go. It’s worth noting here that if we only have one test we don’t need to wrap it in a describe block. But when we have multiple tests, it’s helpful to organize them in this way.
Now that we have a grouping for our tests, we can start writing those individual tests. We do this by using the Jest test() method. For its arguments, the test method takes a string to define the test and a function where the actual testing logic will go.
📃AppHeader.spec.js
test('a simple string that defines your test', () => {
  // testing logic
})
TIP: You might also see test blocks that use it() and this will also work because it’s an alias for test().
So our two tests will start out looking like this:
📃AppHeader.spec.js
test('if user is not logged in, do not show logout button', () => {
  // test body
})

test('if a user is logged in, show logout button', () => {
  // test body
})
So we have the tests set up, but they don’t do anything yet. We need to add some logic in the body of them to determine if the actual result matches the result we are expecting.
Asserting Expectations
In Jest, we use assertions to determine whether what we expect the test to return matches what is actually returned. Specifically, we do this by using Jest’s expect() method, which gives us access to a number of “matchers” that help us match the actual result against the expected result.
The syntax for an assertion basically works like this:
expect(theResult).toBe(true)
Inside the expect() method, we’re putting the result itself that we’re testing. We then use a matcher to determine if that result is what we expected it to be. So here, we’re using the common Jest matcher toBe() to say: we expect the result to be true.
When writing tests, it’s helpful to first write a test that you know will definitely pass (or definitely fail). For example, if we say: expect(true).toBe(true) we know this will definitely pass. The result that’s passed into expect() is true and we are saying we expect that result toBe true. So if we were to run these tests, we know they will definitely pass because true == true.
📃AppHeader.spec.js
describe('AppHeader', () => {
  test('if a user is not logged in, do not show the logout button', () => {
    expect(true).toBe(true)
  })

  test('if a user is logged in, show the logout button', () => {
    expect(true).toBe(true)
  })
})
If these tests don’t pass, then we know we’ve set something else up wrong elsewhere in our code. So writing this kind of test serves as a form of sanity test for us, preventing us from wasting time debugging our testing code when tests that should be passing are not.
Understanding how to write tests means understanding what matchers are available to you, so take some time to understand the Jest Matchers API.
The Power of Vue Test Utils
Now that we’ve scaffolded our tests, and got them both passing, we can switch out that “sanity test” with the real logic that can perform our given tests:
- If a user is not logged in, do not show the logout button
- If a user is logged in, show the logout button
In order to do this, we need the AppHeader component to be mounted (to check if the button is visible in the DOM or not). This would be quite a process to perform all on our own, but fortunately with the help of Vue Test Utils, it’s very simple because this library comes packaged with mount.
So let’s import mount into our testing file and see what it can do for us.
📃AppHeader.spec.js
import { mount } from '@vue/test-utils'
import AppHeader from '@/components/AppHeader'

describe('AppHeader', () => {
  test('if user is not logged in, do not show logout button', () => {
    const wrapper = mount(AppHeader) // mounting the component
    expect(true).toBe(true)
  })

  test('if user is logged in, show logout button', () => {
    const wrapper = mount(AppHeader) // mounting the component
    expect(true).toBe(true)
  })
})
Above, in each of our tests we’ve created a wrapper const in which we mount(AppHeader). The reason we’re calling it wrapper is because in addition to mounting the component, this method creates a wrapper that includes methods to test the component. Of course, it’s helpful to understand the different properties and methods on the wrapper, so take some time to explore the documentation.
Sidenote: In the Vue Test Utils you will also find the method shallowMount(). If your component has children, shallowMount() will return a simple implementation of that component instead of a fully rendered version. This is important because the focus of a unit test is the component in isolation and not the children of that component.
We’re still not performing our actual tests yet, but now we have a wrapper of the mounted AppHeader component, which we can use to write out the complete tests.
Testing the Button’s visibility
In our first test case, we know that by default the user is not logged in (our input is loggedIn: false) so we want to check and make sure the logout button is not visible.
To make assertions on the state of the logout button, we’ll need to get a reference to the button element that is defined in the template. To accomplish this we will rely on two methods available to us on our new wrapper: find() and isVisible(). The find() method will search through our template for a matching selector in order to locate our button, and isVisible() will return a boolean, telling us if that button is visible in our component or not.
So our first test will look like:
📃AppHeader.spec.js
  test('if user is not logged in, do not show logout button', () => {
    const wrapper = mount(AppHeader)
    expect(wrapper.find('button').isVisible()).toBe(false)
  })
For our second test, we want to find the button in the same way, but this time we expect it to be visible, so we’ll say: toBe(true).
📃AppHeader.spec.js
  test("if logged in, show logout button", () => {
    const wrapper = mount(AppHeader)
    expect(wrapper.find('button').isVisible()).toBe(true)
  })
Because we are testing the components behavior when we have a user (when loggedIn is true), we need to update that value or else this test will fail. How we do we this? Vue Test Utils to the rescue!
📃AppHeader.spec.js
  test('if logged in, show logout button', () => {
    const wrapper = mount(AppHeader)
    wrapper.setData({ loggedIn: true }) // setting our data value
    expect(wrapper.find('button').isVisible()).toBe(true)
  })
Here, we’re using the wrapper’s built-in setData() method to set our data to fit the correct scenario that we’re testing. Now, when we run our tests in the terminal with npm run test:unit, what happens? Hmm… it’s still failing, and for the same reason. Shouldn’t we have fixed this by updating the data value? What’s going on here?
Waiting for DOM Updates
By changing the loggedIn data value, our button should render to the DOM. But we haven’t told our test to wait for DOM updates to happen before it checks our assertions. So what’s happening here is that our test is running before our button can render to the DOM. So of course our test fails, because our button isn’t yet visible. We need to make our test asynchronous so we can force it to wait for DOM updates. We can do this by harnessing the power of async / await.
We’ll add async just before the callback, and after we set the data, we’ll wait for DOM updates to happen. By using nextTick() we can tell our test to wait for those DOM updates before moving on to the assertion. One way to access nextTick() is by calling it from our wrapper, like so: wrapper.vm.$nextTick()
We’ll add async just before the callback, and after we set the data, we’ll wait for the DOM updates to happen. We’ll await the result of setData.
setData returns Vue.nextTick, which is a promise that must be awaited to ensure that Vue updates the DOM before you make an assertion. Here is the full list of methods that can be awaited, as they’re likely to cause updates to your component: <a href="https://vue-test-utils.vuejs.org/v2/api/#setdata" target="blank">setData</a>, <a href="https://vue-test-utils.vuejs.org/v2/api/#setprops" target="blank">setProps</a>, <a href="https://vue-test-utils.vuejs.org/v2/api/#trigger" target="blank">trigger</a>, <a href="https://vue-test-utils.vuejs.org/v2/api/#setvalue" target="blank">setValue</a> .
So our new test will look like this:
test('if logged in, show logout button', async () => {
  const wrapper = mount(AppHeader)
  await wrapper.setData({ loggedIn: true })
  expect(wrapper.find('button').isVisible()).toBe(true)
})
Now when we run our tests, they both are passing. Phew!
Let’s ReVue
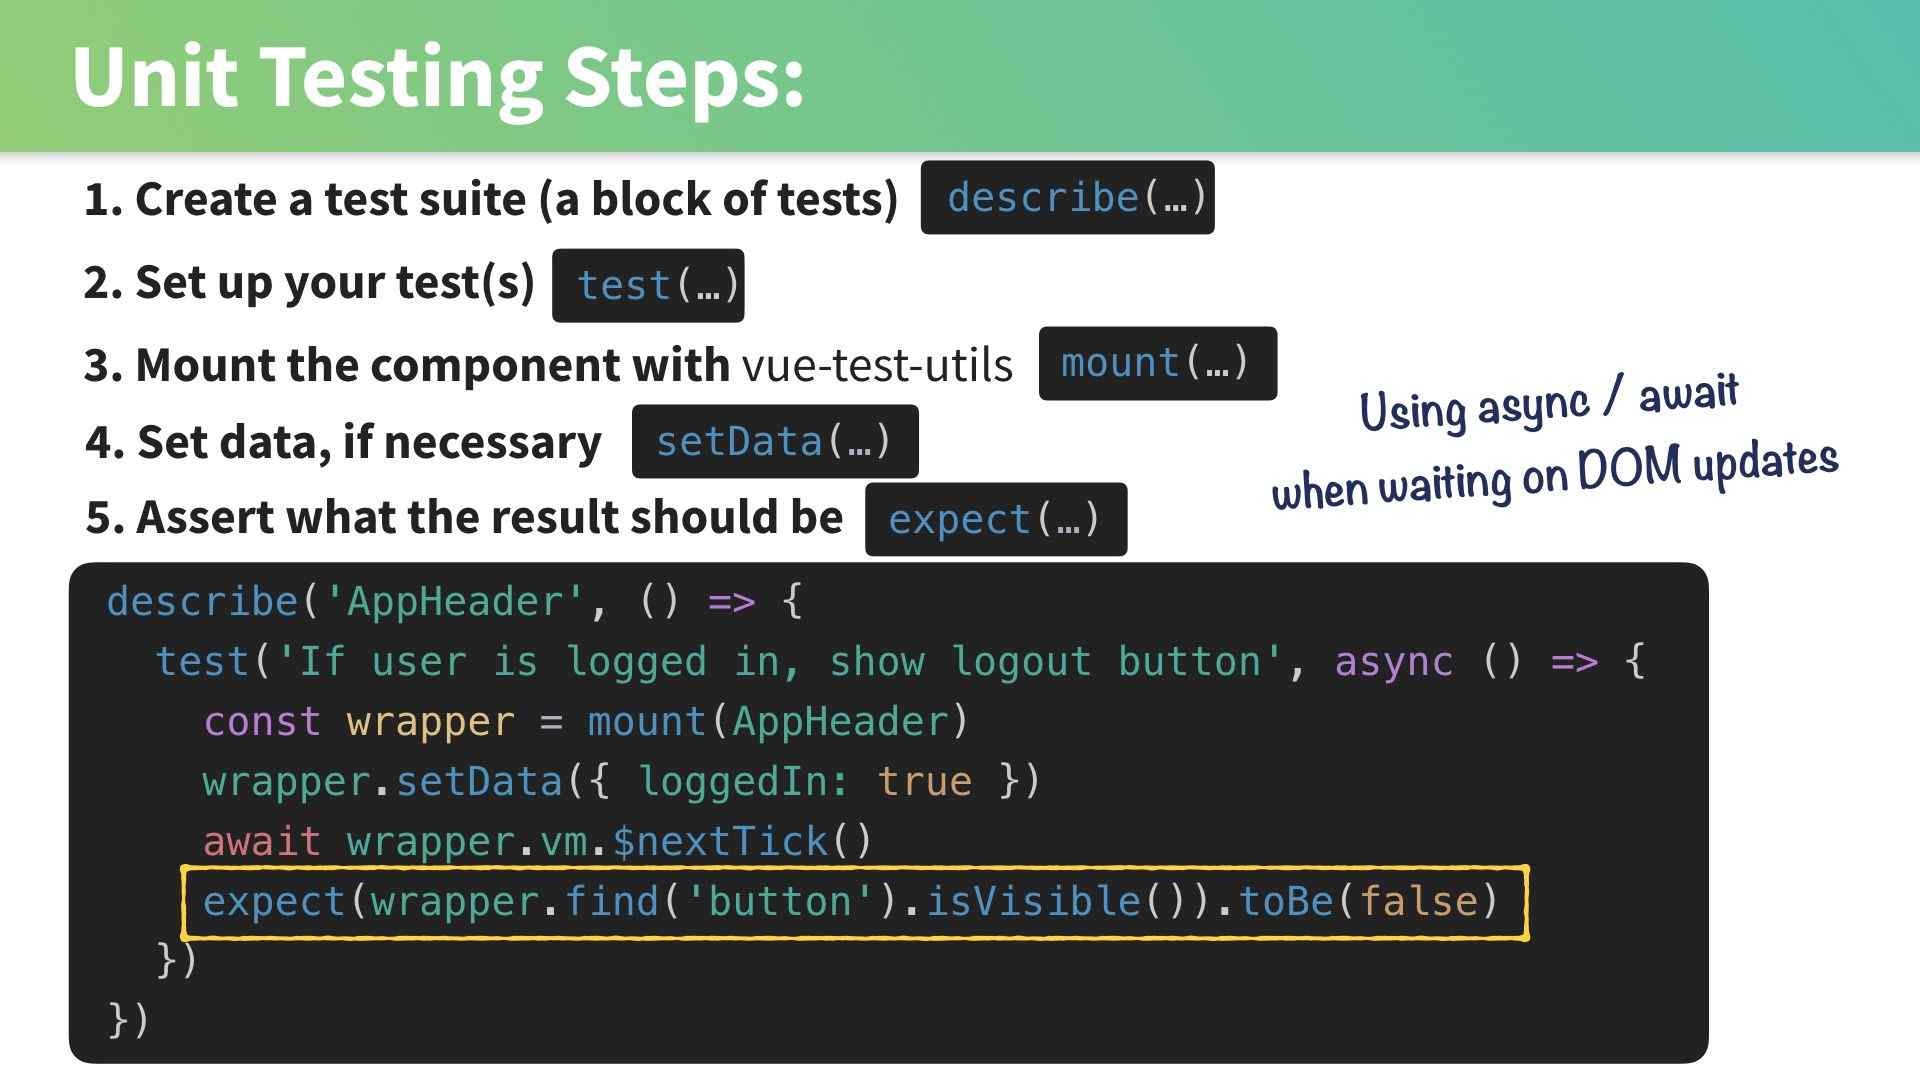
We just covered a lot of steps, as a recap here is what we just did:
Obviously, every component that we are testing is a bit different so these steps may change, especially step 4. Instead of setting the data, we may need to set the props, or simulate user interaction, for example. And we’ll cover more of these test cases in future lessons.


No comments:
Post a Comment